

The Focus Tool Without Removing the Beagle Camera Case
Update: 2022-11-18
1. What is focusing?
The process of finding the maximum resolution, sharpness, and contrast of a selected subject by manual focusing.
2. Why do you need to focus?
Due to the different installation positions of the camera with fixed focal length, the video effect presented is different. At this time, we need to adjust the focus to achieve the best state.
This article will introduce you two methods of focusing, focusing method 1.0 (remove the case), and focusing method V2.0 (no need to remove the case). We will give a brief overview of the advantages and disadvantages of the two methods, and describe the focusing steps in detail for the focusing method V2.0.
Focusing Method V 2.0
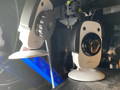
What's this?
To print an external mount print, clamp the protrusion in the lens groove through the hole, and turn the lens to adjust the focus of the camera
Advantages
1. No need to disassemble the shell
Disadvantages
1. Need to print multiple times to find the best size.
2. There are skills in installation
3. There are skills in rotating and focusing
Where to get the STL file of this tool?
Thingiverse
Step 1 - Print the Twist Focus Tool
1. Find the hole size suitable for your camera lens size
This method has higher requirements on the size of the printed part, as well errors are inevitable. After many tests, I found the best hand-twisted print on the hole diameter size of 0.1-0.4mm. I used PETG material and printed 4 simple focusing tools with different hole sizes (φ10.8/φ10.9/φ11/φ11.1/φ11.2) at the same time, and then tried them one by one.
Maybe you can't find the best diameter size in the link. At this time, you can use the "XY Size Compensation" setting in "Advanced" in the slicing software to compensate (the parameter name comes from PrusaSlicer 2.4.2, other slices Software generally has parameters similar to compensation).
2. Print the full version of the focusing tool
When you finish printing, don't remove all the parts from the platform immediately. Please compare the position of the model in the slicing software, then remove them one by one, try to assemble, and put them back in their original positions one by one (because of the size of the model, Not enough to draw dimension information on the model, so this is a way too).
After you find the size that fits best, you can find the full version of the focusing tool and print it again.


Step 2 - Install and Adjust Focus
1. Install focusing tools
Align the hole of the focusing tool with the groove of the lens, then install the two sides of the focusing tool with both hands. Press lightly to ensure that the focusing tool is stuck in the groove of the lens.
2. Rotate the focus tool
Turn the focusing tool by hand to adjust the focus. The only thing to note is that the focusing tool in this method cannot bear the force perpendicular to the lens, please gently move the hand-twist part to adjust the focus. Too fast, or applying force in the wrong direction can cause the focusing tool to disengage from the lens groove. In this case, you need to re-engage it, and then rotate it.
!!!PAY ATTENTION!!!
The defaults version of the camera is night vision mode. When you install the focusing tool, Beagle Camera will automatically switch to night vision, so you may see the video in black and white. At this point, you can select settings on Beagleprint and find "Camera Night Version" and change it to "Color Night Version".

Focusing Method V 1.0
What's this?
This is the way to disassemble the shell and turn the lens directly by hand to adjust the focal length of the camera.
Advantages
1. It is very easy and simple to twist the lens by hand.
Disadvantages
1. Trouble with disassembly and assembly
2. Self-tapping screw installation, cannot be disassembled multiple times
3. Involves cable removal, which requires careful operation

In Conclusion
In the paragraphs above, you will find the entire content of this article. It compares the advantages and disadvantages of the two different focusing methods. The focus can be adjusted either by disassembling the casing or by applying certain skills without removing the casing. It would be preferable to avoid disassembling the case, but it requires too much skill (and you may have difficulty getting started).
However, it is worth it if you are serious about the video quality of your camera. Our goal is to bring you as much fun as possible with the Beagle Camera.
So easy, and you can find more time-lapse videos and information our website. Welcome to discuss with us and let 3d printing is more fun. If there's any question or need assistance from us, please feel free to contact us at support@mintion.net.